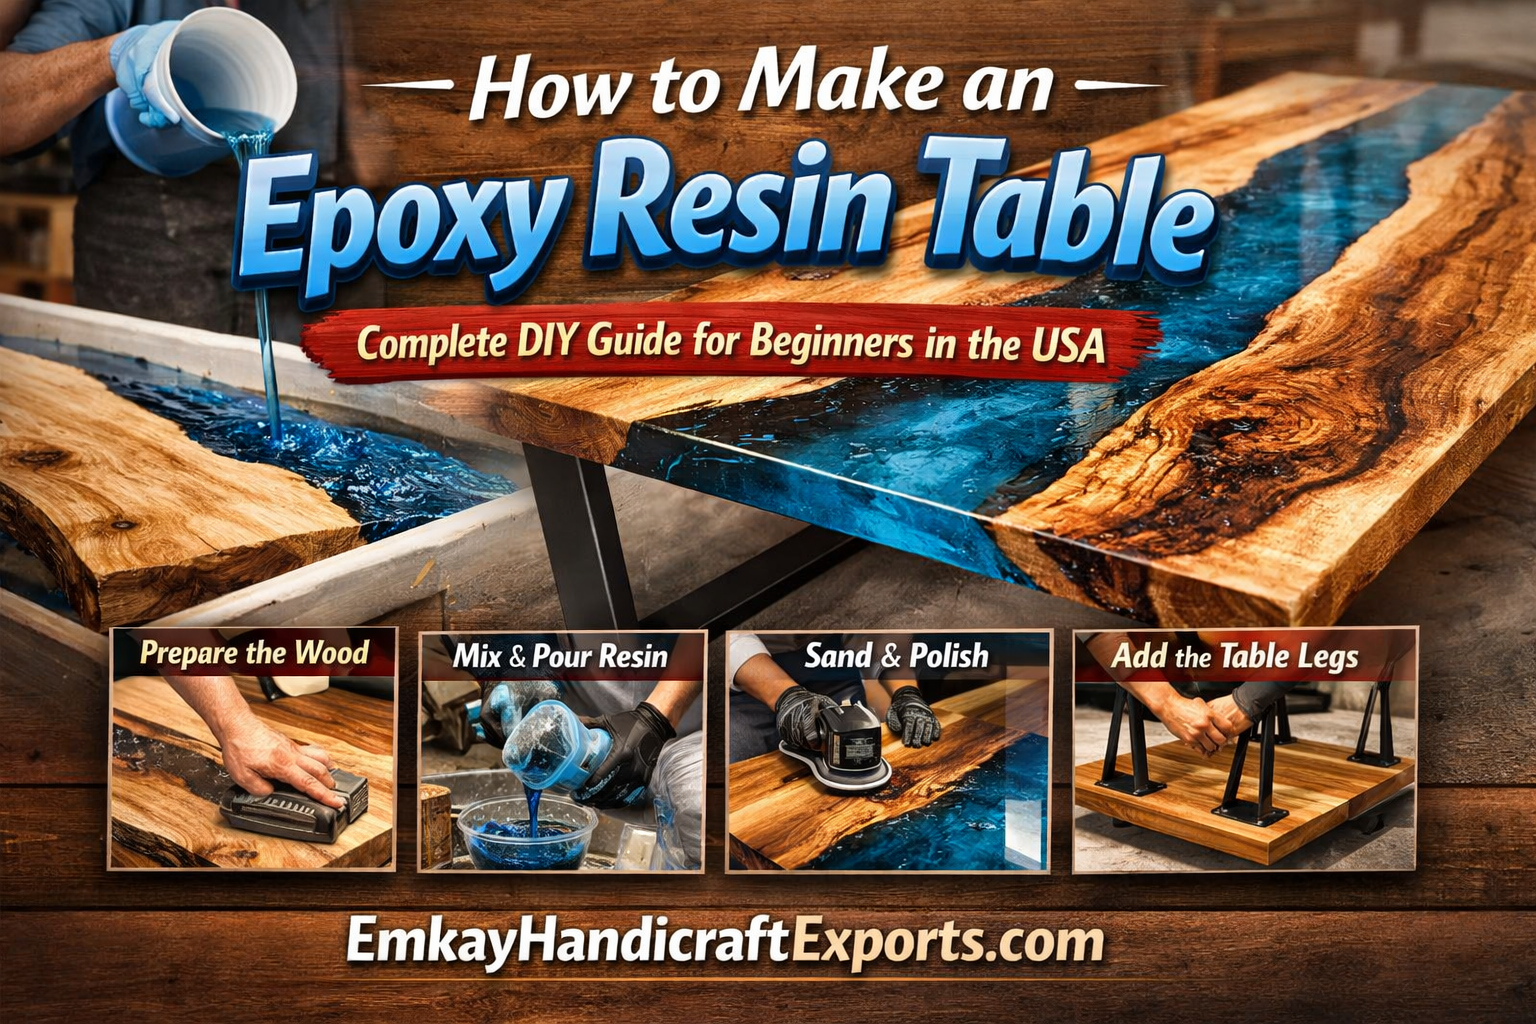
Dreaming of building a stunning epoxy resin table for your home? Whether you want a sleek modern coffee table, a dramatic river dining table, or a custom luxury centerpiece, this beginner-friendly guide will walk you through the full process—from choosing the right wood to pouring, curing, sanding, and finishing like a pro.
In the USA, epoxy resin tables have become one of the most desirable furniture trends for luxury interiors, modern homes, home offices, restaurants, and designer spaces. They’re beautiful, durable, customizable, and surprisingly achievable if you follow the right process.
If you love the look but prefer professionally handcrafted luxury furniture, you can also explore premium handmade resin and stone furniture collections at Emkay Handicraft Exports via Emkay Handicraft Exports
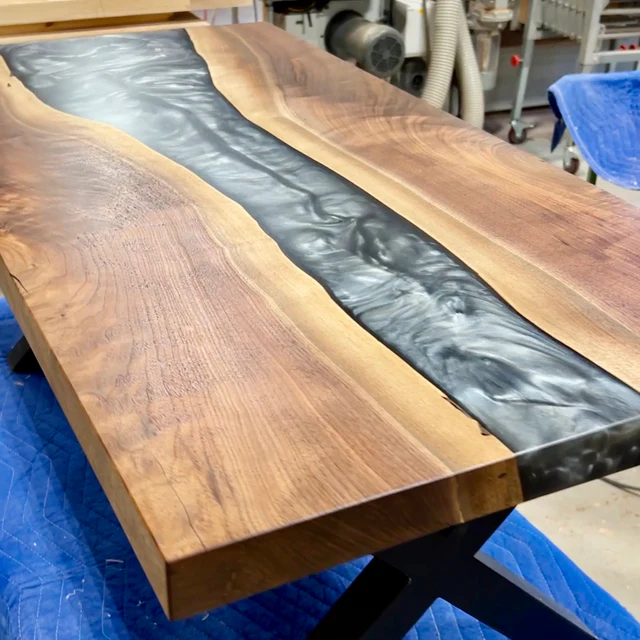
Table of Contents
- What Is an Epoxy Resin Table?
- Why Epoxy Resin Tables Are So Popular in the USA
- Tools and Materials You’ll Need
- Best Wood for Epoxy Tables
- Types of Epoxy Resin Explained
- Step-by-Step: How to Make an Epoxy Resin Table
- Beginner Mistakes to Avoid
- Safety Tips for Working with Resin
- Cost Breakdown for USA DIYers
- DIY vs Custom Handmade Tables
- Pro Finishing Tips
- FAQs
- Final Thoughts
What Is an Epoxy Resin Table?
An epoxy resin table is a custom table made by combining wood, stone, pigment, or decorative materials with clear or colored epoxy resin. The resin is poured into cracks, gaps, molds, or “river” channels and then cured into a hard, glossy, durable surface.
Popular styles in the USA include:
- River epoxy tables
- Live edge resin tables
- Black epoxy dining tables
- Blue ocean resin coffee tables
- Luxury metallic resin center tables
- Custom resin conference tables
- Epoxy side tables and bar tops
The result? A table that feels like functional art.
Why Epoxy Resin Tables Are So Popular in the USA
American homeowners and interior designers love epoxy resin tables because they combine:
- Luxury aesthetics
- Natural wood character
- Modern design appeal
- Custom color options
- Long-lasting durability
- Unique handcrafted value
They fit beautifully into:
- Modern homes
- Farmhouse interiors
- Luxury apartments
- Boutique hotels
- Upscale restaurants
- Home office setups
- Designer commercial spaces
For brands like Emkay Handicraft Exports, epoxy and handcrafted furniture appeal strongly to USA buyers who want statement decor with artisan craftsmanship.
Tools and Materials You’ll Need
Before you start, gather everything. A resin table project becomes much easier when you prepare properly.
Essential Materials
- Kiln-dried wood slab or boards
- Deep pour epoxy resin
- Tabletop epoxy (for final top coat)
- Resin pigment or mica powder (optional)
- Mold material (melamine, HDPE, or sealed plywood)
- Silicone caulk or mold sealant
- Wood sealer or thin epoxy seal coat
- Sandpaper (80 to 3000 grit)
- Wood finish or polish
- Table legs or metal base
Essential Tools
- Orbital sander
- Circular saw or track saw
- Router or planer (optional but useful)
- Drill and screws
- Mixing buckets
- Measuring cups or digital scale
- Stir sticks
- Heat gun or propane torch
- Clamps
- Level
- Safety gloves
- Safety glasses
- Organic vapor respirator
Quick Overview: What You Need Most
| Category | Beginner Essentials | Why It Matters |
|---|---|---|
| Wood | Kiln-dried slab or hardwood boards | Reduces moisture problems |
| Resin | Deep pour epoxy + tabletop epoxy | For casting and final finish |
| Mold | Sealed melamine or HDPE mold | Holds resin in shape |
| Tools | Sander, cups, torch, clamps | Makes the process manageable |
| Safety | Gloves, respirator, eye protection | Resin safety is non-negotiable |
Best Wood for Epoxy Tables
Not all wood performs equally well with epoxy. If you want professional-looking results, choose wood that is stable, dry, and visually attractive.
Best Wood Choices for USA DIY Projects
- Walnut – rich, dark, luxurious
- Maple – clean, bright, modern
- Oak – strong and classic
- Cedar – rustic and aromatic
- Elm – great grain patterns
- Ash – clean and contemporary
- Acacia – bold and decorative
What to Look for in Wood
- Moisture content below 10–12%
- Flat, stable slab
- Minimal active cracks
- Beautiful grain or live edge
- No loose bark
Pro Tip: Avoid using freshly cut “green” wood. Wet wood and epoxy are a bad combination and often lead to bubbles, separation, and cracking later.
Types of Epoxy Resin Explained
This is where many beginners get confused.
1) Deep Pour Epoxy
Used for thicker resin pours, such as river channels or large voids.
Best for:
- River tables
- Thick cast sections
- Decorative channels
2) Tabletop Epoxy
Used as a thin, glossy top coat after the main structure is complete.
Best for:
- Final finish
- Protective clear coating
- High-gloss top surfaces
3) UV-Resistant Finishing Resin
Helpful for reducing yellowing over time, especially in bright interiors.
Resin Type Comparison Table
| Resin Type | Best Use | Typical Pour Depth | Beginner Friendly? |
|---|---|---|---|
| Deep Pour Epoxy | River tables, void fills | 1–2 inches (depends on brand) | Yes |
| Tabletop Epoxy | Surface coating | 1/8 inch approx. | Very Yes |
| Casting Epoxy | Decorative embed projects | Varies | Moderate |
Important: Always use the resin according to the manufacturer’s instructions, especially for mix ratio, maximum pour depth, and cure time. Common systems vary between 1:1 and 2:1, and you should never guess or “adjust” the ratio yourself. Accurate measuring and mixing are among the most important factors for a proper cure.
Step-by-Step: How to Make an Epoxy Resin Table
Now let’s get into the actual build process.
Step 1: Choose Your Table Design
First, decide what you’re making:
- Coffee table
- Dining table
- Side table
- Console table
- Office desk
- River table
Good Beginner Project Sizes
If this is your first epoxy table, start with:
- Small coffee table
- Side table
- Console table
A large dining table is possible, but it requires more resin, more sanding, more curing control, and a higher budget.
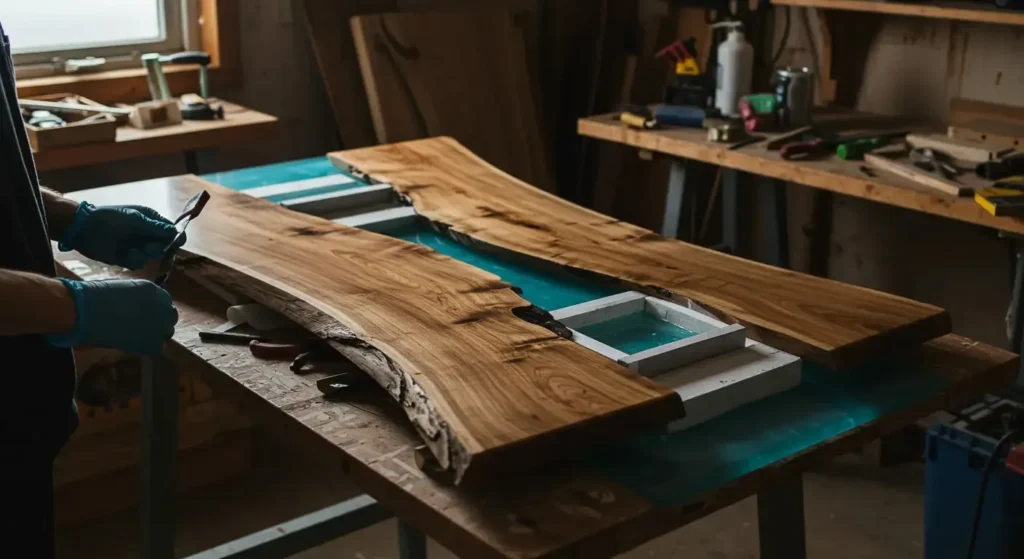
Step 2: Prepare the Wood
This is one of the most important parts of the project.
What to Do:
- Remove loose bark
- Clean dust and dirt
- Cut the slab to size
- Flatten the wood if needed
- Fill tiny cracks if necessary
- Sand the wood lightly
Recommended Beginner Sanding Before Pour
- Start at 80 grit
- Move to 120 grit
- Finish around 150 grit
This gives the epoxy enough surface to bond while keeping the wood clean and smooth.
Why This Step Matters
If your wood is:
- too wet,
- too dusty,
- oily,
- or uneven,
your table can fail later.
Step 3: Build the Mold
The mold is the frame that holds your wood and resin while everything cures.
Best Mold Materials
- Melamine board
- HDPE sheet
- Sealed plywood
Mold Building Tips
- Make the mold slightly bigger than the slab
- Seal all joints with silicone
- Tape or wax surfaces to prevent sticking
- Make sure it is completely level
Common Beginner Mistake
A tiny leak can waste a lot of expensive resin—so test your mold carefully before pouring.
Step 4: Seal the Wood First
Wood is porous, and trapped air inside the grain can release into the resin later, causing bubbles.
What to Do
Brush or spread a thin seal coat of epoxy over:
- the live edges
- cracks
- porous grain
- open knots
This helps reduce outgassing and bubble issues during the main pour. Surface prep and seal coats are especially important on porous woods and are widely recommended in tabletop epoxy guidance.
Let It Cure
Allow the seal coat to become tacky or cure according to product instructions.
Step 5: Measure and Mix the Epoxy Correctly
This is where many DIY projects go wrong.
The Golden Rule:
Follow the exact mix ratio printed on your resin system.
Do not:
- eyeball it
- add extra hardener
- guess by feel
- switch between volume and weight unless the product specifically allows it
Many beginner-safe systems are 1:1 by volume, while some deep pour systems are 2:1 or another ratio. Temperature also matters: many table and bar-top epoxies recommend keeping the material and room in a warm, controlled range (often roughly 70–85°F) to improve flow and curing.
Best Mixing Method for Beginners
- Measure accurately
- Pour into a mixing bucket
- Stir slowly for 3–5 minutes
- Scrape the sides and bottom
- Transfer into a second clean cup
- Mix again
This “double-cup method” is commonly recommended because it helps reduce unmixed resin or hardener left on the container walls. Community makers also emphasize slow mixing, scraping thoroughly, and using a flat mixing tool instead of porous stir sticks when bubble control matters.
Beginner Mixing Checklist
| Step | What to Do | Why It Matters |
|---|---|---|
| 1 | Read product instructions | Ratios vary by brand |
| 2 | Measure exactly | Prevents sticky or brittle cure |
| 3 | Mix slowly | Reduces bubbles |
| 4 | Scrape sides and bottom | Ensures full blend |
| 5 | Re-mix in second cup | Avoids unmixed residue |
Step 6: Add Color (Optional)
This is where your table gets personality.
Popular USA Resin Table Colors
- Ocean blue
- Emerald green
- Smoky black
- Pearl white
- Metallic gold
- Clear crystal look
You Can Use:
- Resin pigment paste
- Alcohol ink (only if compatible)
- Mica powder
- Metallic powders
Pro Tip
Start with a small amount of pigment. Too much can affect transparency or even performance depending on the resin.
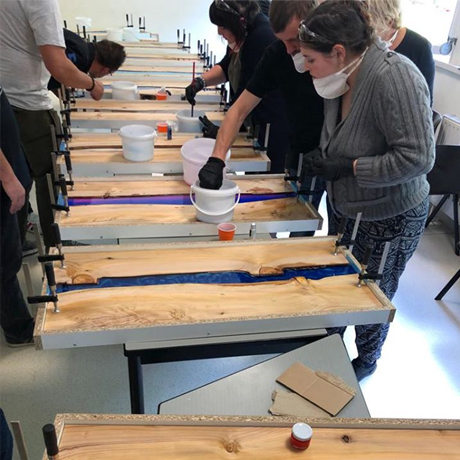
Step 7: Pour the Resin
Now the fun begins.
Pouring Tips for Beginners
- Pour slowly
- Pour in thin, controlled streams
- Keep the mold level
- Don’t exceed the manufacturer’s max pour depth
- Use a spreader only if needed
If You’re Making a River Table
Place the wood slabs on each side and pour resin into the center channel.
Bubble Removal
After pouring:
- Use a heat gun
- Or lightly pass a torch over the surface
Do not hold heat in one place too long, or you may scorch the resin, distort the finish, or create ripples. Gentle bubble-release passes are commonly recommended for tabletop pours.
Step 8: Let It Cure Properly
This part requires patience.
Typical Cure Conditions
Keep your project in a:
- clean
- dust-free
- level
- temperature-controlled space
Avoid During Cure
- touching the surface
- moving the mold too early
- cold garage environments
- direct sunlight
- pets and dust
Cure Time
Depending on resin type, cure time can range from:
- 24 hours
- 48 hours
- 72+ hours
- or longer for thick deep pours
Do not rush this step.
Step 9: Remove the Mold
Once fully cured:
- Unscrew the mold
- Carefully release the table slab
- Trim any sharp resin overflow
- Inspect for imperfections
At this stage, your table may still look rough around the edges. That’s normal.
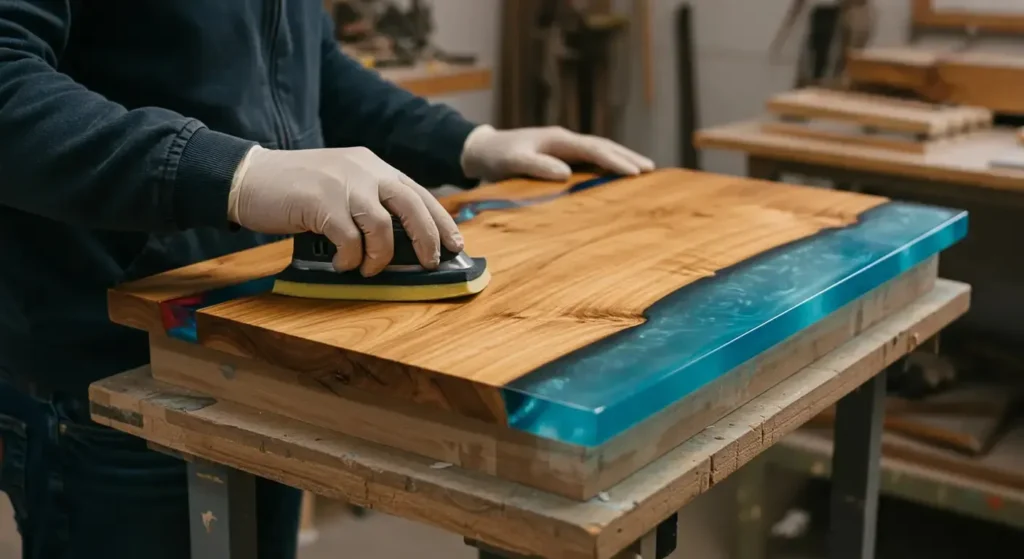
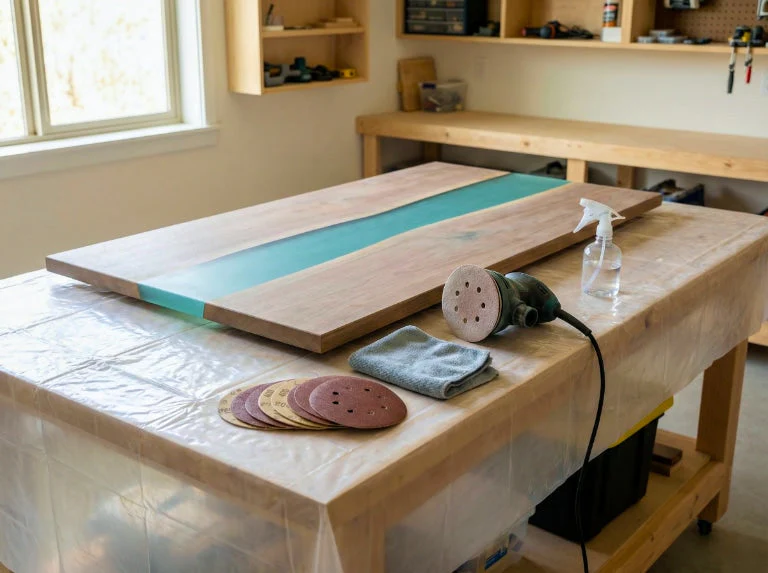
Step 10: Flatten, Trim, and Sand
This is where your project starts looking premium.
What You’ll Do
- Trim the edges
- Flatten the surface if necessary
- Sand the entire top
Recommended Sanding Progression
For a professional finish, move gradually through the grits.
Example Progression:
- 80 grit
- 120 grit
- 180 grit
- 220 grit
- 320 grit
- 400 grit
- 600 grit
- 800 grit
- 1000+ grit for polished finishes
Important Rule:
Do not skip grits.
Skipping grits often leaves swirl marks or haze that become obvious in glossy resin. Finish quality improves dramatically when you move through sanding progressively and clean dust between stages.
Step 11: Apply the Final Finish
You have two main finishing options:
Option A: Oil / Hardwax Finish
Best if you want:
- a natural wood feel
- satin or matte appearance
- easier touch-ups
Option B: Gloss Epoxy Top Coat
Best if you want:
- ultra-luxury shine
- dramatic depth
- glass-like finish
For Gloss Finish
- Clean the surface thoroughly
- Mix tabletop epoxy carefully
- Pour a thin flood coat
- Spread evenly
- Remove bubbles with heat
- Let cure fully
This final top coat gives your table that luxury showroom look.
Step 12: Install the Table Base or Legs
Choose a base that suits your style and table weight.
Popular USA Table Base Styles
- Black powder-coated metal legs
- X-frame industrial base
- U-shape steel legs
- Solid wood pedestal base
- Hairpin legs for small tables
Important
Make sure the base:
- supports the slab weight
- is balanced
- is secured properly
Resin tables can be heavy, especially larger dining or conference pieces.
Common Beginner Mistakes to Avoid
Here are the biggest mistakes first-time makers in the USA often make:
1. Using wet wood
This can cause bubbles, warping, and long-term failure.
2. Buying the wrong epoxy
Deep pour and tabletop resin are not the same thing.
3. Guessing the mix ratio
This often causes sticky or soft resin.
4. Pouring too thick
Excess depth can create overheating or cracks.
5. Skipping the seal coat
This can lead to bubbles and poor edge clarity.
6. Rushing the sanding process
That “almost done” feeling is where many tables lose their premium look.
7. Working in the wrong temperature
Cold resin = thicker resin = more bubbles and bad cure.
8. Not building a leak-proof mold
One leak can ruin the project and your budget.
Safety Tips for Working with Epoxy Resin
DIY is fun. Chemical burns and fume headaches are not.
Always Use:
- Nitrile gloves
- Safety goggles
- Organic vapor respirator
- Long sleeves
- Good ventilation
Avoid:
- Skin contact
- Mixing in closed bedrooms
- Open flames near chemicals
- Using food containers for resin
USA Garage/Workshop Tip
If you’re building in a garage, maintain stable temperatures and airflow—especially in winter or humid conditions.
Estimated DIY Epoxy Table Cost in the USA
Your budget depends on size, wood choice, and resin quantity.
| Project Type | Estimated DIY Cost (USA) | Difficulty |
|---|---|---|
| Small Side Table | $150–$350 | Easy |
| Coffee Table | $250–$700 | Moderate |
| River Dining Table | $700–$2,500+ | Advanced |
| Luxury Designer Table | $1,500–$5,000+ | High |
Main Cost Factors
- Resin brand
- Wood slab quality
- Pigments
- Tools
- Sanding supplies
- Base or legs
If you’re making one for the first time, remember:
DIY can save money, but mistakes can get expensive quickly.
DIY vs Buying a Professionally Handcrafted Resin Table
Many USA buyers start with DIY inspiration but later decide they want a professionally made luxury table instead.
DIY Is Best If You:
- enjoy woodworking
- have workspace
- want a custom hobby project
- don’t mind trial and error
Buying Handmade Is Best If You:
- want a luxury finish
- need guaranteed craftsmanship
- want custom dimensions
- prefer professional-grade results
- are furnishing a premium home or business
If you’d rather invest in a statement piece instead of building from scratch, explore handcrafted luxury furniture and decor collections from Emkay Handicraft Exports. Their aesthetic is especially appealing for homeowners and interior buyers looking for premium artisanal furniture, custom decor, and elegant statement pieces.
Why USA Buyers Love Handmade Luxury Tables
A handcrafted epoxy or artisan table isn’t just furniture—it becomes:
- a conversation piece
- a design statement
- a long-term investment
- a centerpiece for luxury living
That’s exactly why websites like Emkay Handicraft Exports can attract buyers searching for:
- luxury resin tables USA
- custom handmade furniture
- statement coffee tables
- luxury dining tables
- premium artisan decor
Pro Tips to Make Your Table Look Expensive
If you want that premium “designer” finish, follow these expert tips:
1. Use better wood
Beautiful slabs make a huge difference.
2. Keep colors elegant
Black, smoke, pearl, deep blue, and emerald look more luxurious than random bright tones.
3. Polish the edges
Crisp edges instantly elevate the piece.
4. Don’t overfill with pigment
Clarity often looks more expensive than muddy opacity.
5. Use a quality base
Cheap legs can ruin an otherwise beautiful tabletop.
6. Finish in a clean environment
Dust and hair in cured resin will instantly cheapen the final look.
Frequently Asked Questions (FAQs)
1) Is it hard to make an epoxy resin table?
It can be beginner-friendly if you start small and follow the correct process. A coffee table or side table is much easier than a large dining table.
2) How much epoxy resin do I need for a table?
It depends on:
- table size
- resin depth
- width of river or voids
- total design
Most resin brands provide volume calculators. Always buy a little extra to avoid running short mid-pour.
3) What is the best epoxy resin for beginners in the USA?
Look for:
- easy mix ratio
- low odor
- bubble release
- beginner-friendly instructions
- clear finish
- UV resistance
Many beginners prefer 1:1 systems for top coats, but for river tables, deep pour systems are often necessary depending on thickness and manufacturer specs.
4) Can I make an epoxy table without expensive tools?
Yes, but a few tools make life much easier:
- sander
- measuring tools
- torch or heat gun
- saw
- clamps
You do not need a full professional workshop to begin.
5) Why is my epoxy resin sticky?
The most common reasons are:
- wrong mix ratio
- poor mixing
- cold temperature
- wrong resin type
- under-curing
Sticky resin is usually a sign that something went wrong during mixing or curing.
6) How long does an epoxy resin table last?
A well-made epoxy resin table can last many years with proper care. High-quality wood, correct curing, and a durable finish make a huge difference.
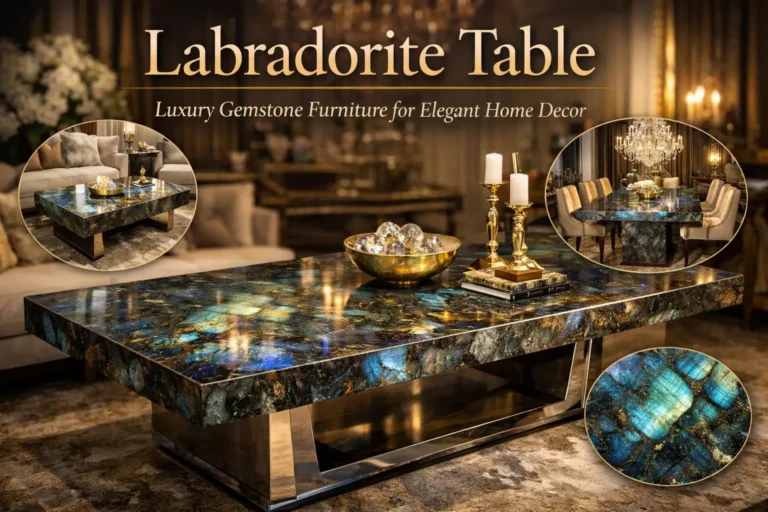
7) Are epoxy resin tables good for luxury homes?
Absolutely. In the USA, epoxy resin tables are especially popular in:
- luxury living rooms
- designer dining rooms
- modern office spaces
- boutique hospitality interiors
They offer both function and artistic value.
8) Where can I buy luxury handmade tables online?
If you love handcrafted statement furniture and decor, you can browse curated collections from Emkay Handicraft Exports at Visit the official website.
Final Thoughts
Making your own epoxy resin table is one of the most rewarding DIY furniture projects you can take on. It combines woodworking, creativity, design, and craftsmanship into one beautiful result.
For beginners in the USA, the secret is simple:
- Start small
- Use dry quality wood
- Choose the right resin
- Measure carefully
- Be patient with curing
- Never rush sanding and finishing
And if you want the luxury resin table look without the trial and error, professionally handcrafted furniture from Emkay Handicraft Exports offers an elegant shortcut to the same high-end aesthetic.
A great epoxy resin table doesn’t just fill a room.
It defines it.
Looking for a luxury handcrafted statement table instead of building one yourself?
Explore elegant artisan furniture and premium home decor at Emkay Handicraft Exports and bring timeless craftsmanship into your home.
You May also Like:
